Horseshoe Nails: A Unique Twist for Your Next Nail Design
Want to ditch the usual manicures and embrace a trend that’s both stylish and surprisingly wearable? Then you need to explore horseshoe nails. This unique nail shape is taking the beauty world by storm, offering a fresh take on classic nail designs. Whether you’re a seasoned nail artist or a beginner eager to try something new, this comprehensive guide will equip you with everything you need to master the art of nails shaped like horseshoes, horseshoe nail art.
What Are Horseshoe Nails?
Horseshoe nails are a captivating nail shape characterized by their rounded, slightly curved tips, reminiscent of, you guessed it, a horseshoe! Unlike the sharp points of stiletto nails or the squared-off look of other shapes, the horseshoe nail offers a softer, more feminine appeal. This shape is incredibly versatile, offering the perfect canvas for both minimalist designs and intricate nail art. It’s a modern interpretation of classic nail shapes, striking a balance between edgy and elegant. The gentle curve also tends to be more forgiving on natural nails, making it a popular choice among those seeking a stylish yet practical option. More and more nail salons are incorporating horseshoe nails into their service menus, signifying its growing popularity and mainstream acceptance in the nail art industry.
Beginner’s Guide to Horseshoe Nails
Thinking about trying horseshoe nails yourself? It’s easier than you might think! The key is to focus on achieving that gentle, rounded curve. Don’t be intimidated by the unique shape; with practice and the right tools, you can master it. One common misconception is that you need extensive nail art experience. While advanced nail art on this shape looks stunning, the horseshoe shape itself is relatively straightforward to achieve. Start by focusing on shaping your nails correctly and perfecting the curve before experimenting with intricate designs. Simple solid colors or subtle glitter accents can look incredibly chic on horseshoe nails.
Nail Prep Checklist
Before embarking on your horseshoe nail journey, make sure you’ve got these essentials:
- 💅 Nail file (medium and fine grit)
- ✨ Cuticle pusher
- 💧 Cuticle remover
- ✨ Nail buffer
- 🧴 Nail strengthener or base coat
- 🎨 Nail polish of your choice (gel or regular)
- ✨ Top coat
- 💡 Good lighting
Remember to push back your cuticles gently but firmly before filing and shaping your nails. This ensures a clean base for your horseshoe nails. Always file in one direction to avoid weakening your nails.
How to Create Horseshoe Nails – Step-by-Step
Step 1: Shaping Your Nails
Start with clean, dry nails. Using your medium-grit file, gently shape your nails into a rounded oval. Imagine a slightly elongated oval as the foundation. This step determines the foundation of your horseshoe nails.
Step 2: Creating the Curve
This is where the magic happens! Using your fine-grit file, carefully file the tip of each nail into a gentle, smooth curve. Focus on creating consistent curvature across all nails for a uniform look. Avoid creating sharp angles; the gentler the curve, the better the horseshoe nail effect.
Step 3: Buffing and Smoothing
Buff the surface of your nails with a nail buffer to create a smooth surface for better polish adhesion. This step is crucial for a professional-looking finish.
Step 4: Applying Base Coat and Polish
Apply a thin layer of base coat to protect your nails and enhance polish longevity. Once dry, apply two coats of your chosen nail polish color, allowing each coat to dry completely.
Step 5: Top Coat and Finishing Touches
Finish with a top coat for a glossy shine and added protection. For extra durability, consider a UV gel top coat.
Best Practices & Expert Tips
- File Gently: Avoid aggressive filing; this can weaken your nails and ruin their shape.
- Consistency is Key: Ensure all your nails have a similar shape and curve for a unified look.
- Proper Drying Time: Allow each coat of polish to dry completely to prevent smudging.
- Regular Maintenance: Horseshoe nails, like other nail shapes, require regular maintenance to maintain their shape and prevent chipping.
List of Trending Nail Art Ideas for Horseshoe Nails
- Solid Colors: Classic and elegant, solid colors offer a timeless look.
- Ombre: Gradual color transitions are gorgeous on the curve of horseshoe nails.
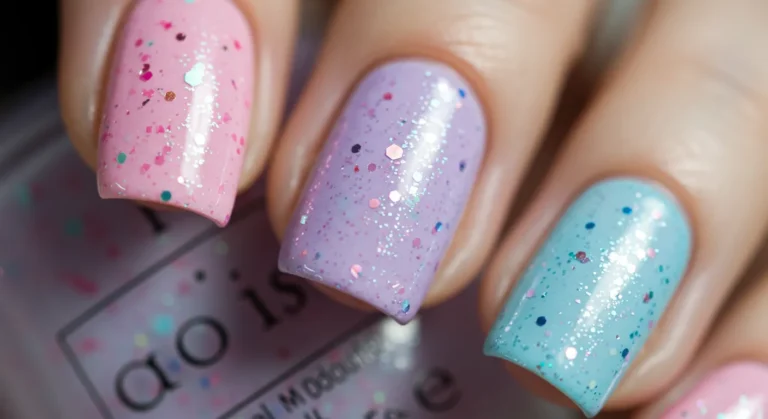
- Glitter: Add sparkle with glitter accents or a full glitter coat.
- Floral Designs: Delicate florals look beautiful on this shape.
- Abstract Art: The curve provides a beautiful canvas for modern, abstract nail art.
FAQs About Horseshoe Nails
Q: How long do horseshoe nails last?
A: With proper care and a good quality top coat, horseshoe nails can last just as long as other nail shapes. However, because of the curved tip, they may be more prone to chipping if you frequently use your hands for manual labor.
Q: Are horseshoe nails difficult to maintain?
A: Maintaining horseshoe nails is similar to maintaining other nail shapes. Regular touch-ups and careful handling are best practices, particularly if you choose longer lengths.
Q: Can I achieve horseshoe nails at home?
A: Yes! With a little patience and the right tools, you can easily create horseshoe nails at home, following the guide outlined above.
Q: What nail polish types work best with horseshoe nails?
A: Gel polish is ideal for its durability and longevity on horseshoe nails, but regular nail polishes work well too; just be mindful of the potential for chipping.
Q: Are horseshoe nails suitable for all nail lengths?
A: Horseshoe nails are great on various nail lengths! Whether short and chic or long and dramatic, the curve will accentuate your nails beautifully.
Conclusion
Horseshoe nails represent a fun, fresh take on nail design. Their unique curve and versatility make them a stylish choice for any occasion. From simple elegance to intricate art, the possibilities are endless! So, why not try this captivating trend and discover the beauty of the horseshoe nail shape? Share your creations with us in the comments below and let us know your favorite designs! And don’t forget to pin this for later!